This is a very simple sewing pattern for a Blythe party hat. Simply print out the PDF pattern piece and follow the instructions below.
Materials
- Small piece of fabric
- Small piece of interfacing (I find fusible/iron on interfacing is easiest to work with)
- This pattern printed out Click Here For PDF Pattern
- Thread
- Decorative ribbon or lace for edge of hat
- Bias binding for hat ties
Method
- Print and cut out the pattern piece. Click Here For PDF Pattern
- Using the pattern piece cut one copy out of the fabric.
- Using the same pattern piece cut one copy out of interfacing.
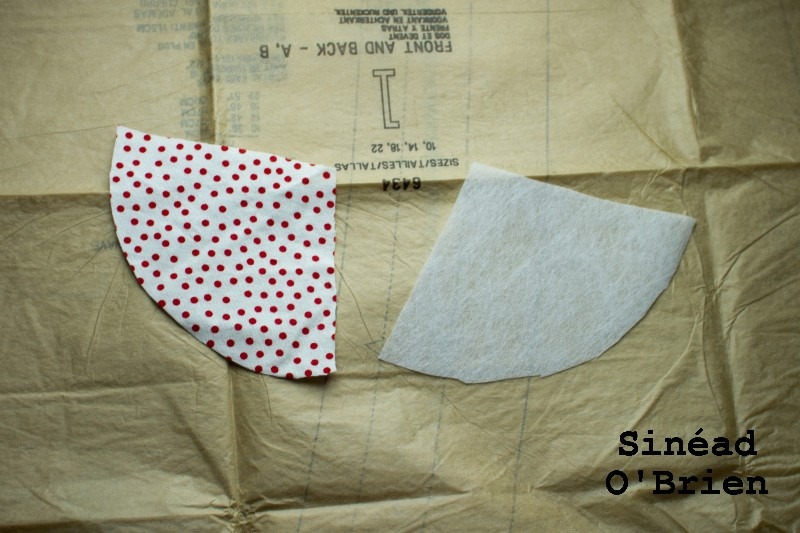
- Iron the interfacing to the back of the fabric piece.

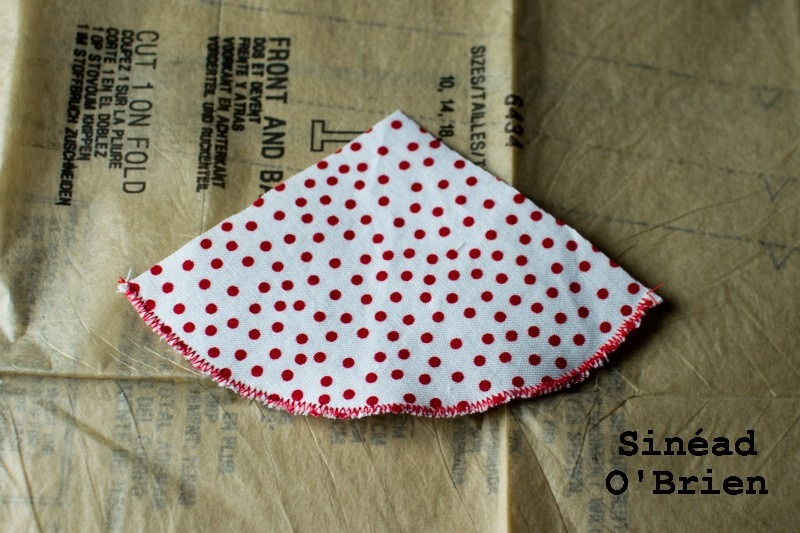
- Once the pieces are cooled trim any edges of the interfacing that may be showing through.
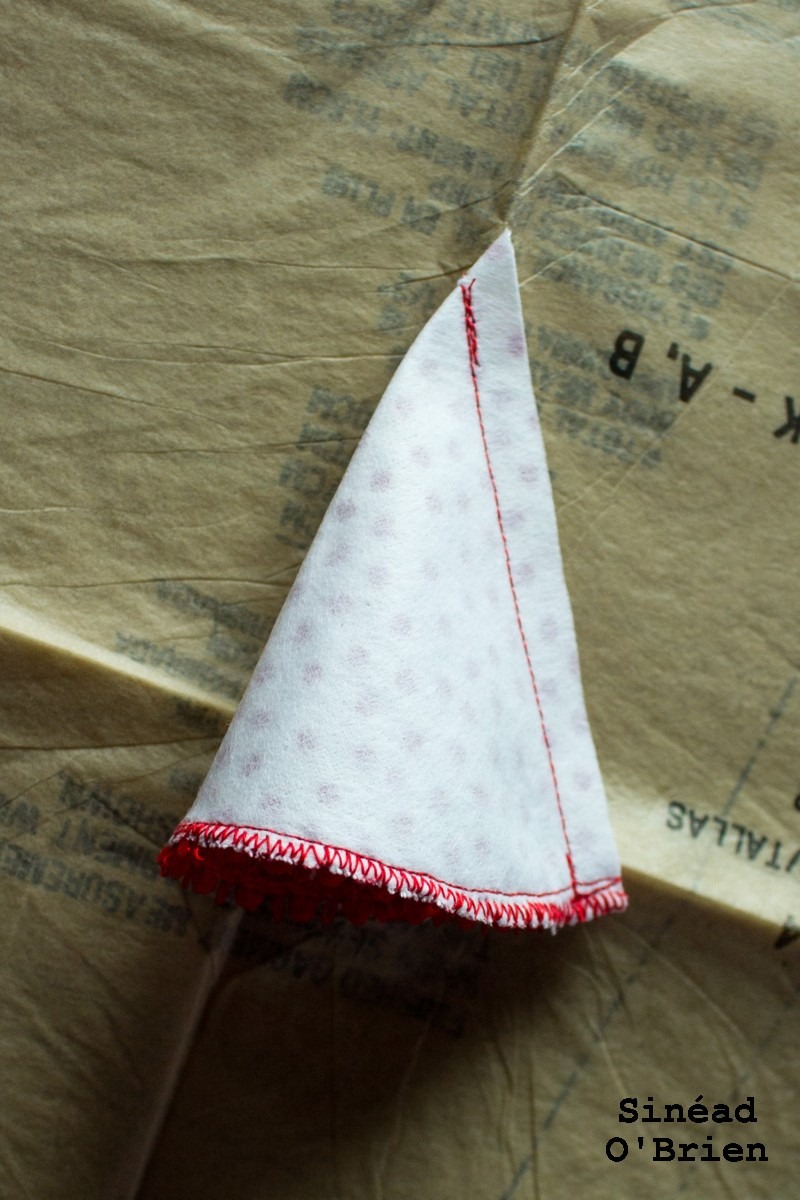
- Zig-zag stitch around the bottom hem of the hat using.
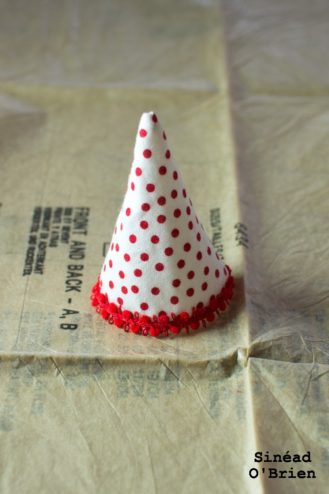
- Sew the decorative ribbon to the bottom rim of the hat to hide the zig-zag stitching.

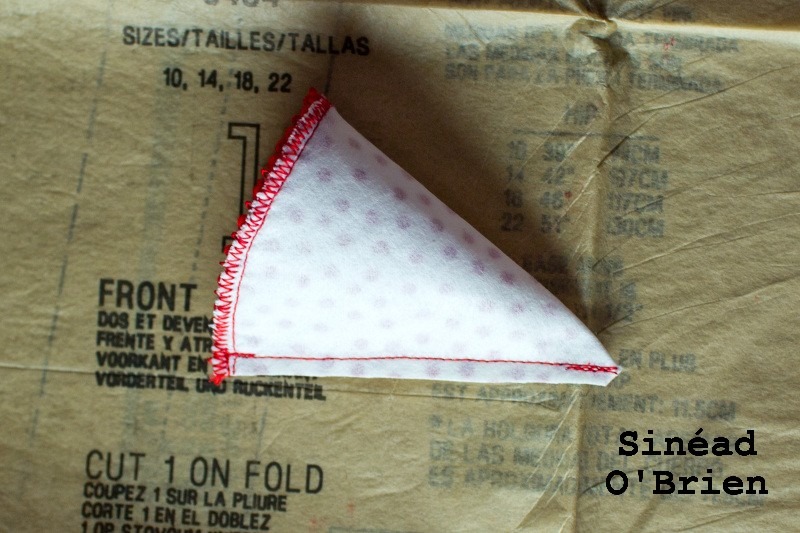
- Gently fold the cone in half, right sides together and sew up the edge.

- Trim off any excess fabric. Snip at the tip (will help improve the shape of the hat)
- Sew the bias binding closed.

- Turn the hat the right way in.
- Sew the bias binding to the inside of the hat hiding the edges from view.
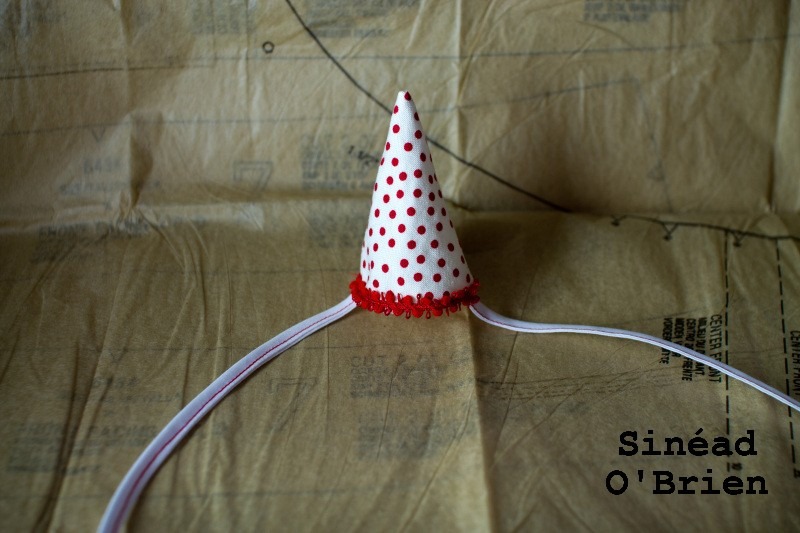
- Add any extra decorations such as pom poms, lace, fake spiders or anything else that catches your fancy.

If you notice an errors or hit any problems when following this tutorial please let me know.
Finally please take a picture and send me a link. It’s always nice to see how people get on.
